This post describes a multiple-pass strategy for ensuring the correctness and quality of pull requests.

Some Buildings and a Hillside in Pomfret, Vermont
Introduction
The quick brown fox jumps over the lazy dog. The quick brown fox jumps over the lazy dog. The quick brown fox jump over the lazy dog. The quick brown fox jumps over the lazy dog.
If you are a conscientious iOS-app developer, you share my goal of delivering high-quality code. This post describes a strategy for achieving that goal that I developed while editing an academic journal: use a variety of review techniques to catch errors. The block quote above shows the need for this strategy. While reading the block quote, you likely recognized the first sentence as a typing exercise and then glossed over the second, third, and fourth sentences, not identifying the typo in the third sentence, the s missing from jump. The same thing can happen when you raise a pull request (PR). In the absence of careful, repeated reviews, errors can all-too-easily slip through.
Before I describe the strategy as it applies to code, I’ll describe the strategy as it applies to prose.
My work on the academic journal involved editing articles that reached 40,000 words or 100 printed pages in length. By “editing” I mean both fixing typos and applying citation rules described in The Bluebook and English-usage rules described in The Chicago Manual of Style. Most of my editing passes involved reading the articles from beginning to end on my laptop and suggesting changes via Microsoft Word’s Track Changes feature. I did this several times per article. But because of the glossing-over phenomenon demonstrated in the block quote above, these linear laptop passes could not and did not catch all errors. So after a few beginning-to-end passes over an article, I read the articles from the end to the beginning, sentence by sentence. This change of order jogged my brain to a degree that I always caught more errors. Some editors went so far as to print the article, read it on paper, and mark errors using a pen. Lacking a printer in my home, where I did most editing, I did not ordinarily print while editing. But I did use the printing technique in one situation.
The front matter of an academic journal consists of, among other things, the cover page of an issue of the journal and the table of contents. A typo in the front matter would be disastrous. While I was a junior editor, the name of an author was misspelled on the cover page of an issue, necessitating recall of the entire print run of the issue. So while I was a senior editor, the editor-in-chief and I each printed the front matter and carefully reviewed printed copies before submitting the issue to the printer. As far as I am aware, there were no front-matter typos during the year that I was a senior editor.
The rest of this post describes how to use a similar multiple-pass strategy in order to maximize PR correctness and quality.
Review Twice Before Raising the PR
At some point during development of a PR, you reach a point where the bugfix or new feature works. Existing and new unit tests pass. You have doubtless been reviewing any code changes as you implement them. Here are two steps for reviewing the changes before raising the PR.
In Xcode
1. Open the Project navigator by typing ⌘-1. You see a mix of unmodified and modified files. The modified files have an M after their names, as shown here.

Xcode Project Navigator Showing One Modified File
2. Click the plus-minus button in the bottom-right corner of the Project navigator. You now see only the modified files.
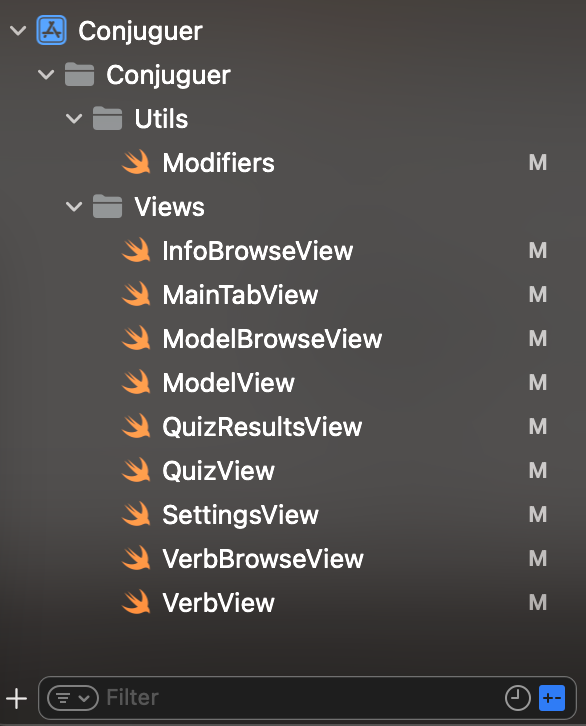
Xcode Project Navigator Showing All Modified Files
Sadly, there is no keyboard shortcut for applying this filter.
3. Click a modified file. Xcode indicates, via blue bars in the left gutter, each place in the file that has been modified.
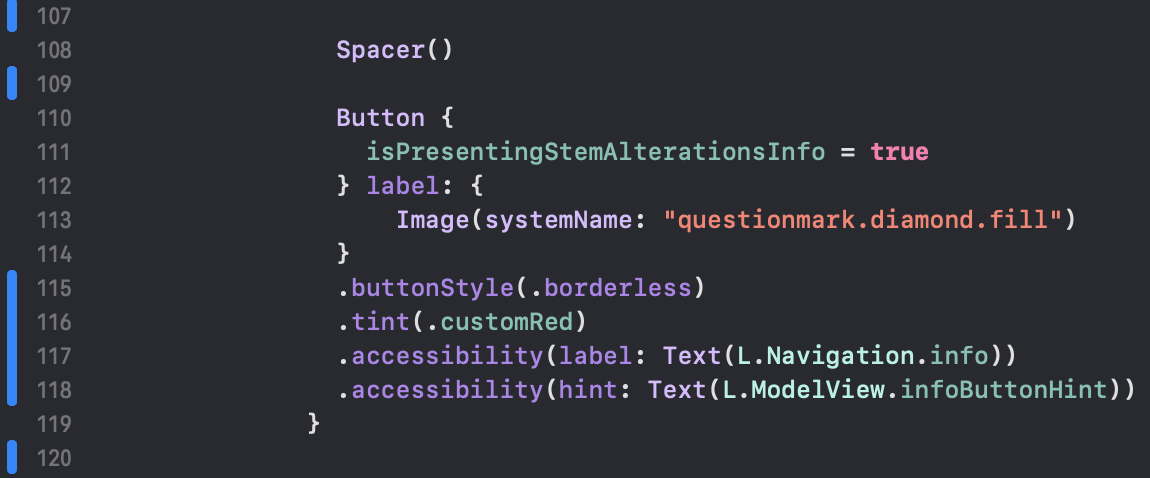
Xcode Indicating Where Changes Are Present
4. Click a blue bar and then click Show Change. Xcode shows before-and-after versions of the modified lines.

Xcode Showing Before-and-After Versions of Modified Lines
5. Verify the correctness of the modification.
6. Repeat these steps for the rest of the file and for every other modified file.
In Terminal
1. Launch Terminal.app and navigate to the root of your project.
2. Run the command git status. This should show only the files you intend to modify in the PR.
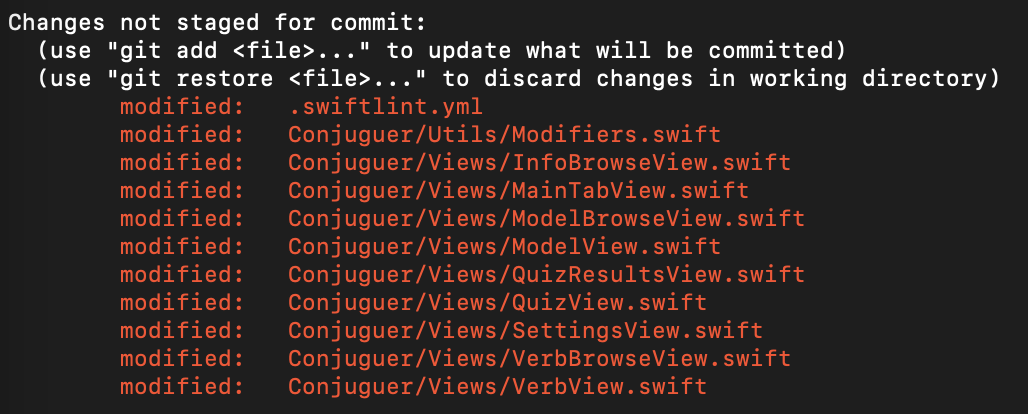
Git Status Showing Modified Files
3. If there are any files you don’t intend to modify for the PR, revert them using the command git checkout FILENAME, where FILENAME is the name of the file you don’t intend to modify. Unintended changes may be present if, for example, in the exploratory phase of your work, you inserted some print() statements to understand how the code worked before you implemented your feature or bugfix. Unintended changes may also be present if you opened a XIB or storyboard in Interface Builder, and Xcode helpfully inserted no-op changes into the underlying XML file.
4. Run the command git diff. After examining every screen of changes, press the spacebar to proceed to the next screen.
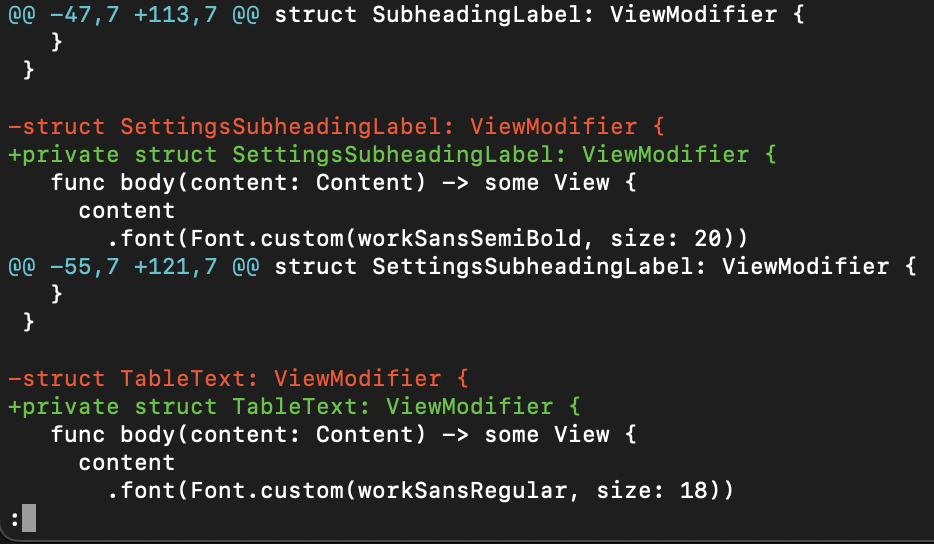
Git Diff Showing Certain Changes
The output of git diff with respect to the project file is particularly helpful because some project-file changes are not readily apparent in Xcode. For example, you may have enabled debugging for the production scheme, but you don’t want this change in the repository’s project file. git diff shows this sort of change, reminding you to revert it.
I use Terminal.app exclusively for interacting with Git, but I understand that GUI clients like Tower can also show what files have changed and how. If you use a client like Tower, use that client for steps 2, 3, and 4 rather than Terminal.app.
Review in GitHub After Raising the PR
GitHub itself provides another venue for reviewing changes in a PR. Follow these steps.
1. Add modified files to a commit and push that commit.
2. Raise your PR on GitHub. While writing this post, I created this PR as a source for the screenshots below.
3. Click the Files changed tab on your PR.

Files Changed Tab in GitHub
4. Review every change for correctness. Here is an example of how a change looks in GitHub. I often add corrective commits at this point. Depending on your level of Git hygiene, you may want to rebase in order to clean up the PR’s commit history.
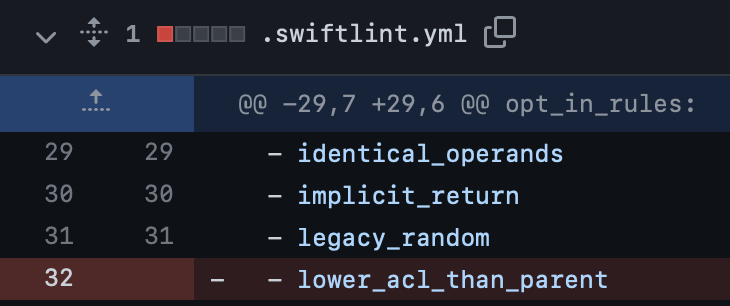
One PR Change as Reflected in GitHub
In theory, every non-obvious change in a PR could be explained in the PR’s description. Step 4 provides a more-contextual venue, however, for explaining specific changes. Here is an example of that.

A Developer Comment on a Specific Change in GitHub
Wrap-Up
These are the steps I take to ensure PR correctness and quality at work and in certain other contexts, applying the multiple-pass strategy I developed while editing an academic journal. I welcome suggestions for augmenting this strategy.